- TOSIZE.fi
- Do it yourself
- DIY Projects
Make your own high storage cupboard for the utility room, by Floris
Make your own high storage cupboard for the utility room, by Floris
Create this project yourself with sheet material cut to size by TOSIZE.fi!
Floris
Above average
3 minutes
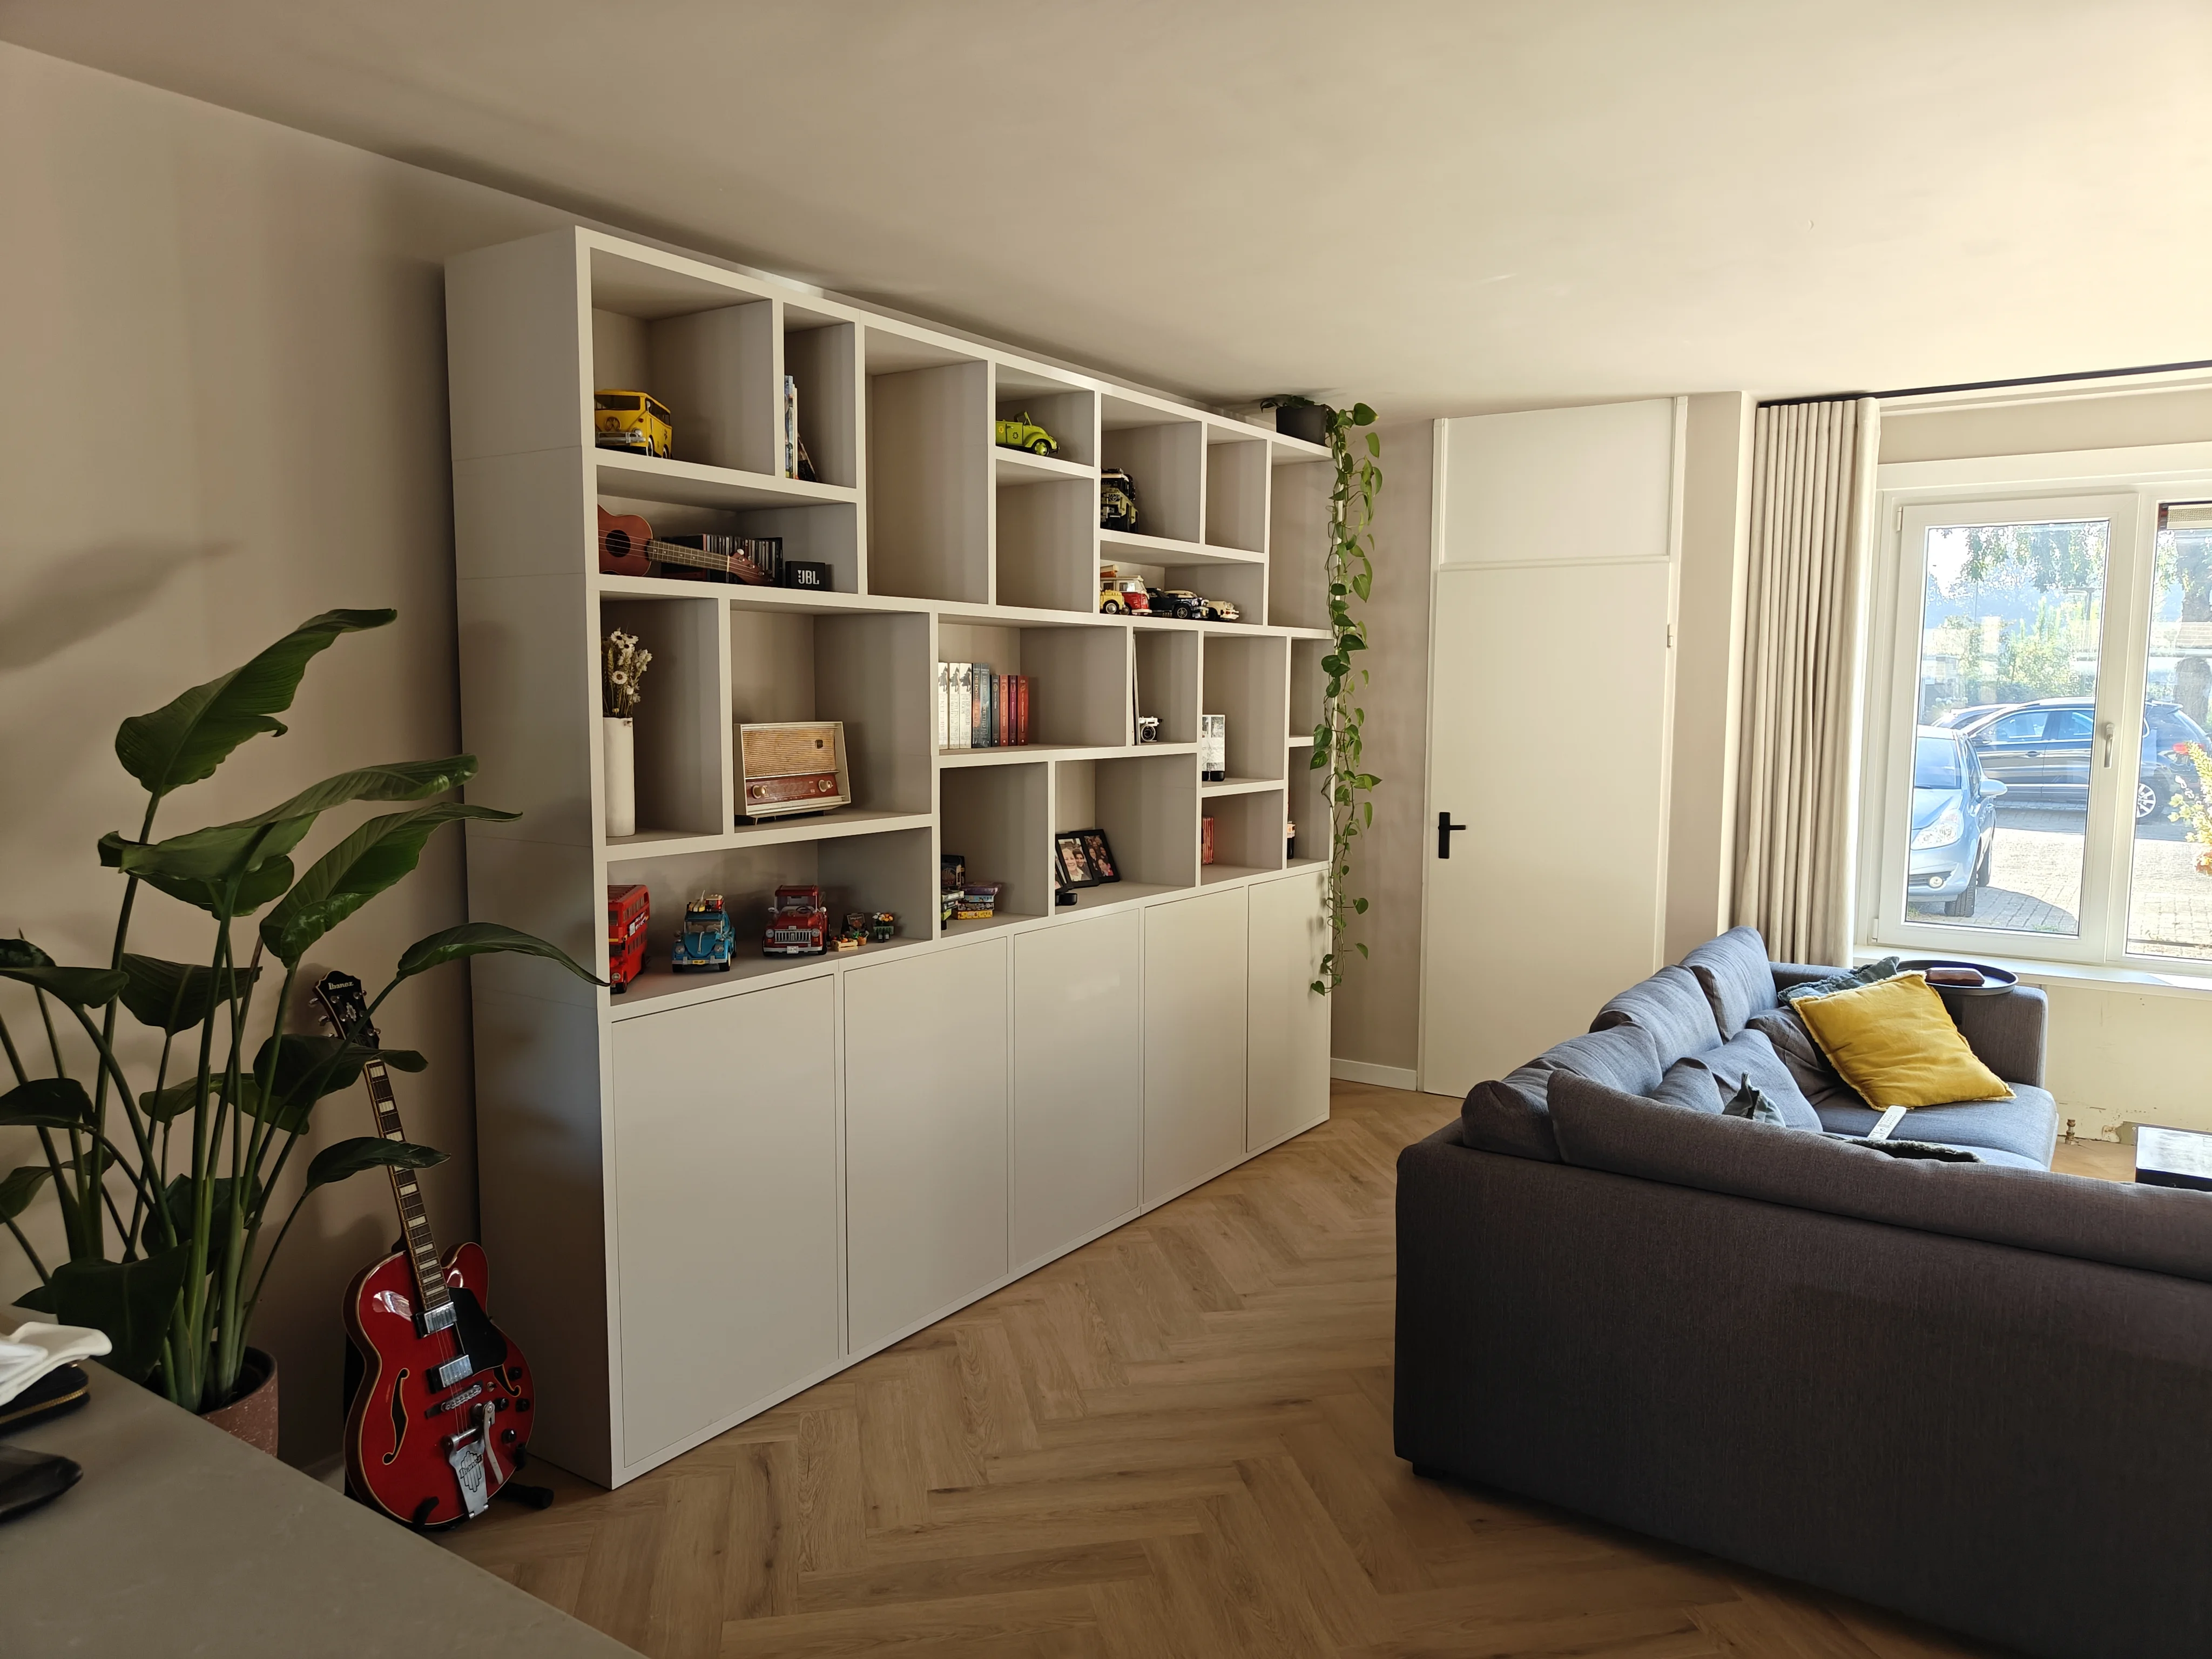
On this page, Floris talks about his homemade storage furniture for the utility room. This high storage cupboard gives you space to hide a lot of stuff! Floris shares his adventure and the steps he took to build this functional cupboard. He describes how he came up with the design, chose the materials and assembled the cabinet. Floris gives useful tips about using the right tools and creating sufficient storage space. Floris has organized and practically furnished his utility room with his homemade storage cupboard. Follow Floris' steps and make your own custom-made storage cupboard for the utility room.
Description of Floris
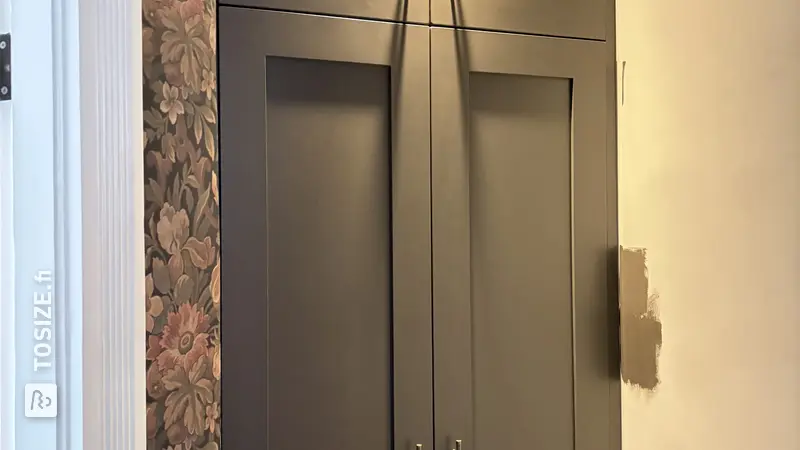
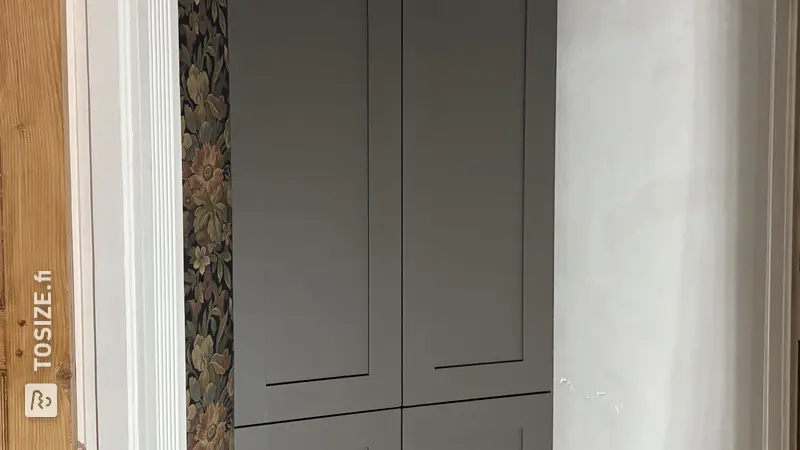
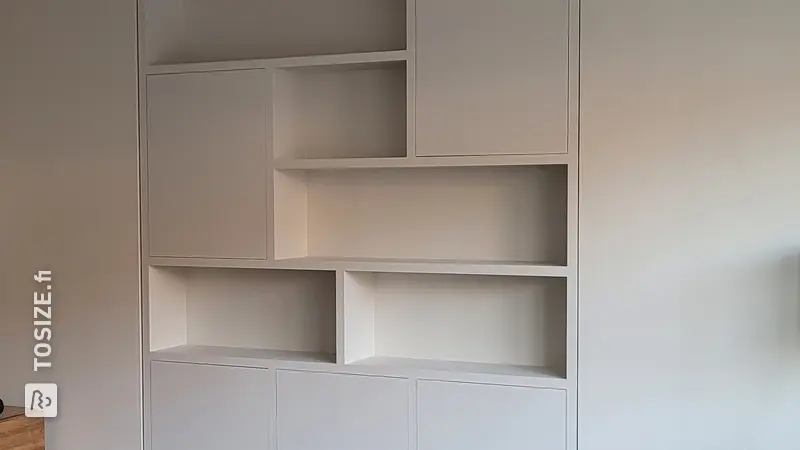
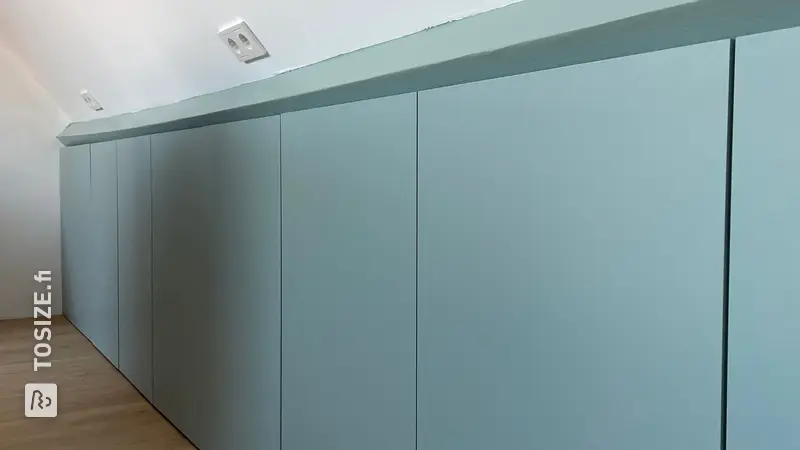
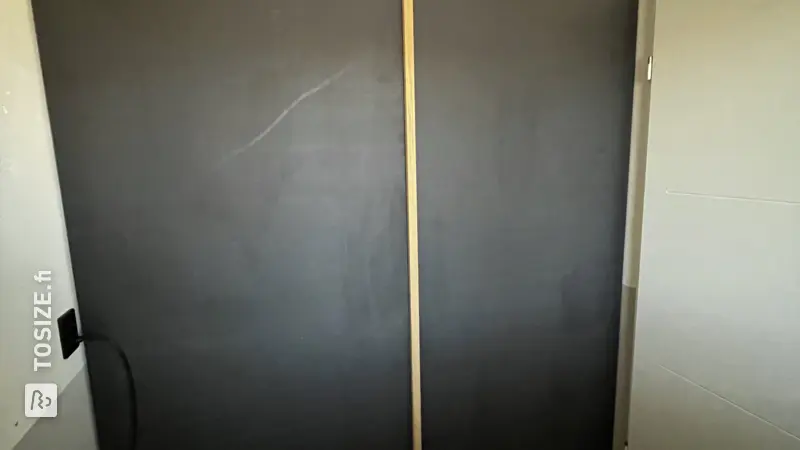
In my utility room I have renovated an existing cupboard, in which my CV can partly be found (right ) and partly a storage cupboard was built (left). I wanted to extend this cupboard from wall to wall and give it a different layout, which would provide considerably more storage space and make the whole thing look better.
How I made this project
I left the central heating part of the cupboard as it is, but I broke off the left part. I only reused the left panel (from floor to ceiling) as the left side of the new cabinet (this is against the wall on the left). This defines the dimensions of the new part of the cupboard.
I then used pine beams to create a simple framework at the front of the cupboard, to which the various parts can be attached (beams from the floor to on the ceiling and in between, so a rectangle). This framework is attached to the panels already placed on the left and right, and to the ceiling). I attached a panel to the left, right, bottom and top of this framework, which was sturdy enough to be able to mount doors on the left and right panels.
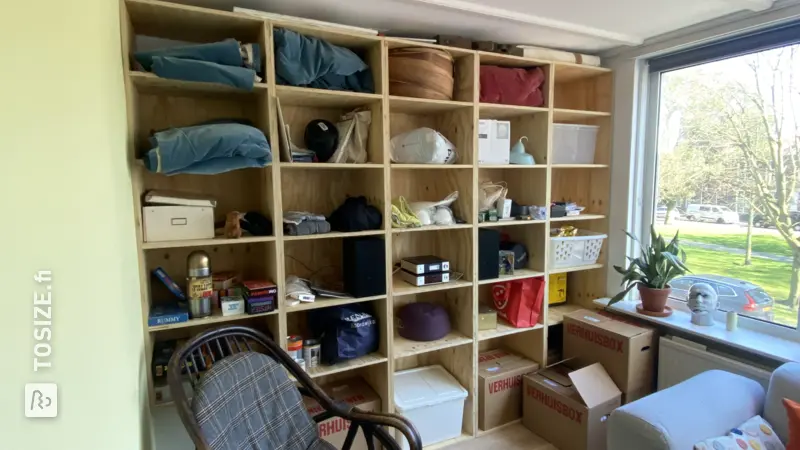
To divide the cupboard into two, I glued two panels together and placed them in the center of the cabinet, these are held in place by the shelves and frame. Then I attached the doors with a piano hinge and installed the shelves. I then planed the whole thing (where necessary) to ensure that the cracks were the same width everywhere and it looked better. I also sanded, primed and varnished the cabinet, where I also made a frame with slats.
Finally, I attached buttons with a sturdy snap closure (this works better than magnets). I still have to finish the frame, but I want to keep it demountable until my new floor has been laid (then the bottom slat will immediately function as a skirting board).
Dimensions of my DIY project
230 .0 x 110.0 cm (only the new part)
Tip! Also check out our handy DIY tips!
What now?
Want to make this DIY project? Check out Floris's saw list and complete your order easily.
406,53 €
All materials used
View all sheet materials