- TOSIZE.fi
- Do it yourself
- DIY Projects
DIY: Make your own headboard from oak slats, by Mariëlle
DIY: Make your own headboard from oak slats, by Mariëlle
Create this project yourself with sheet material cut to size by TOSIZE.fi!
Above average
3 minutes
Description
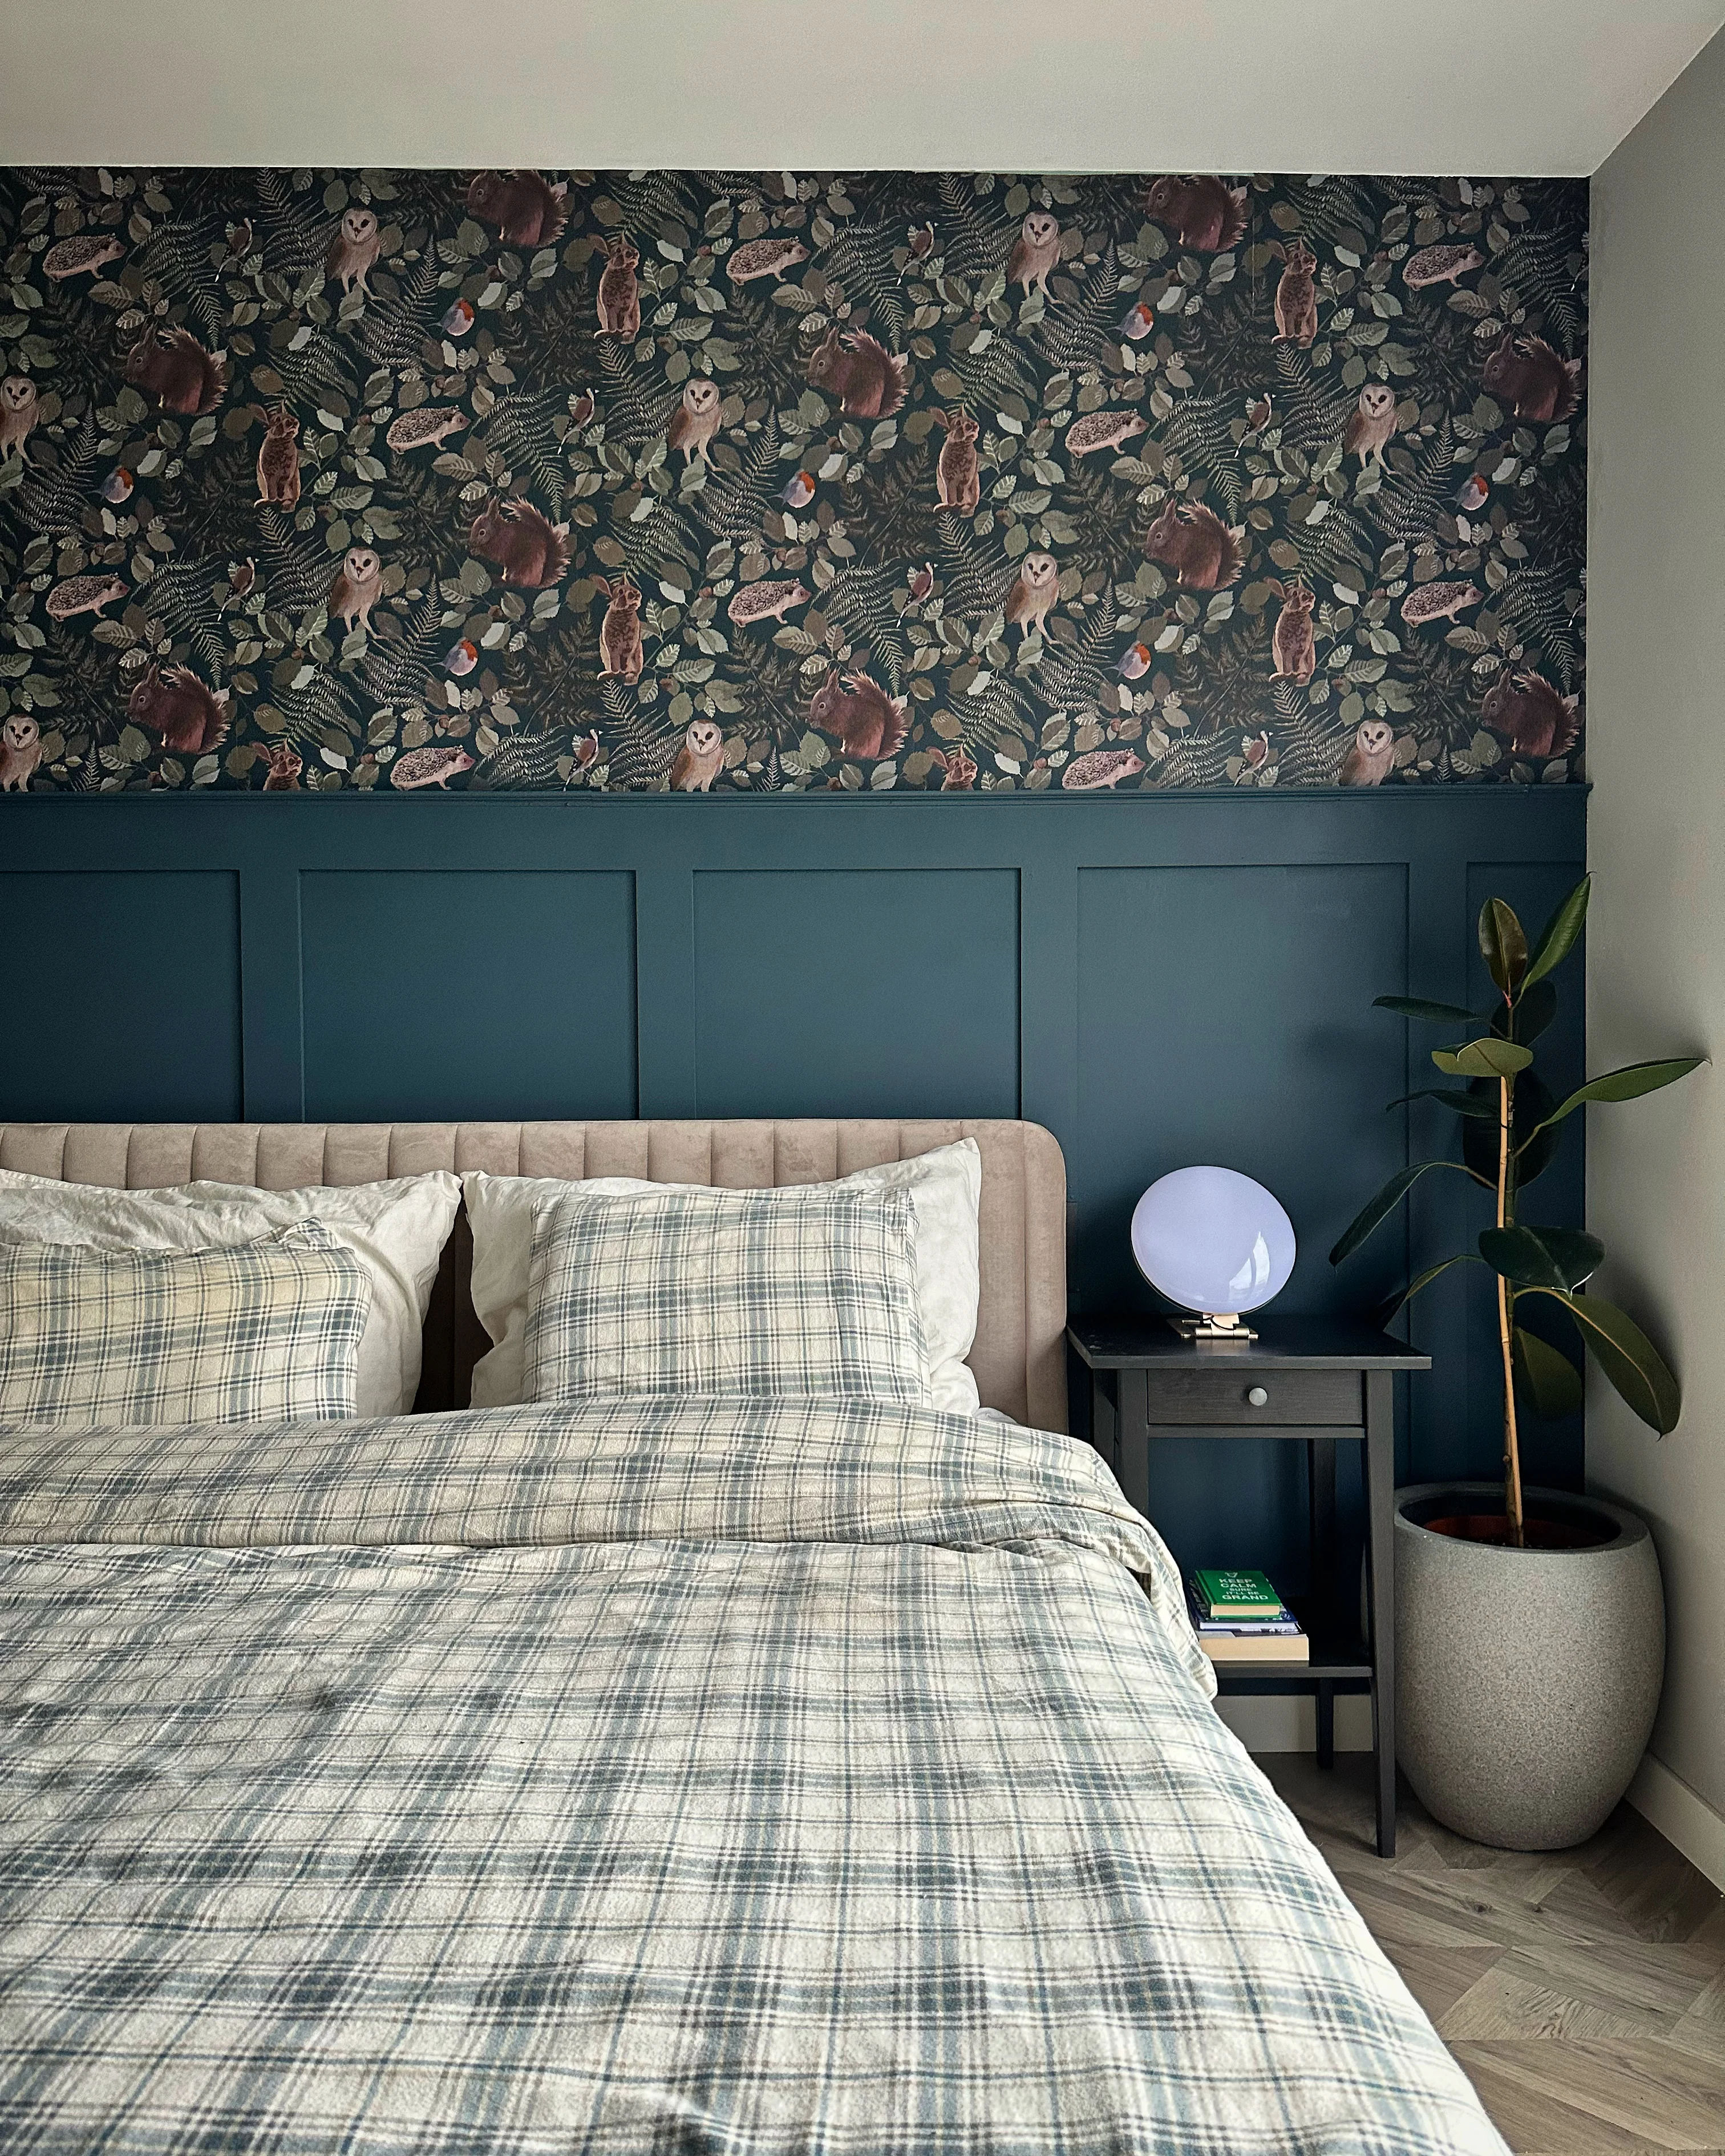
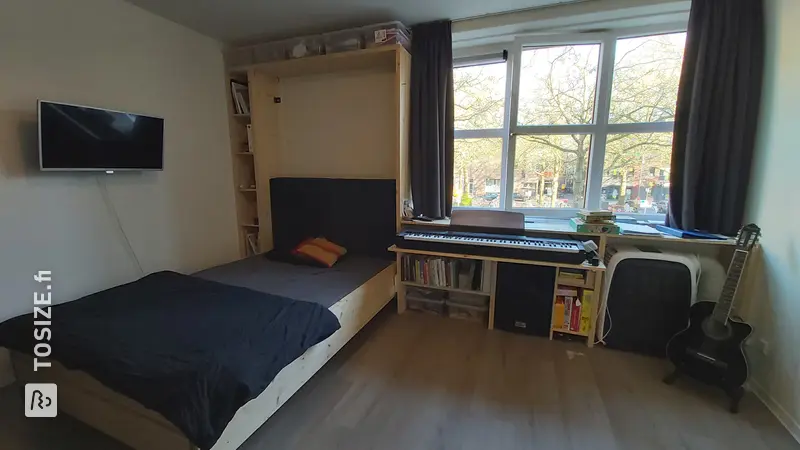
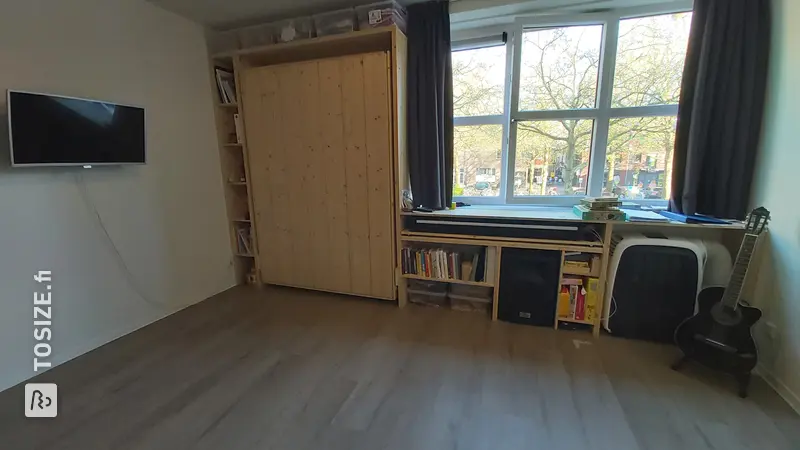
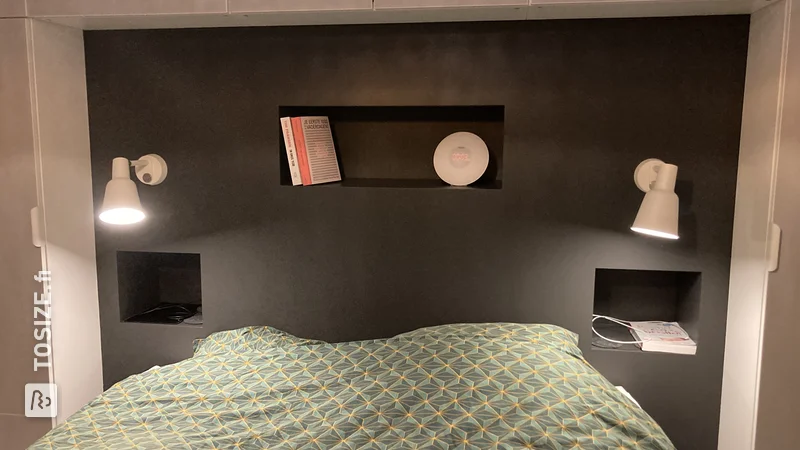
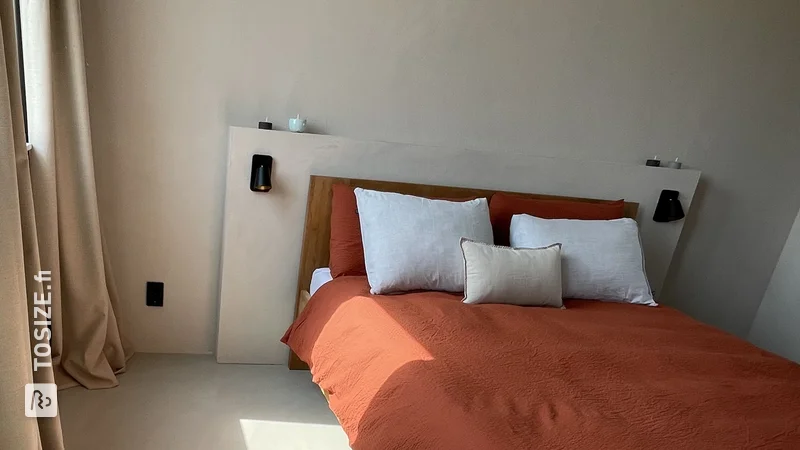
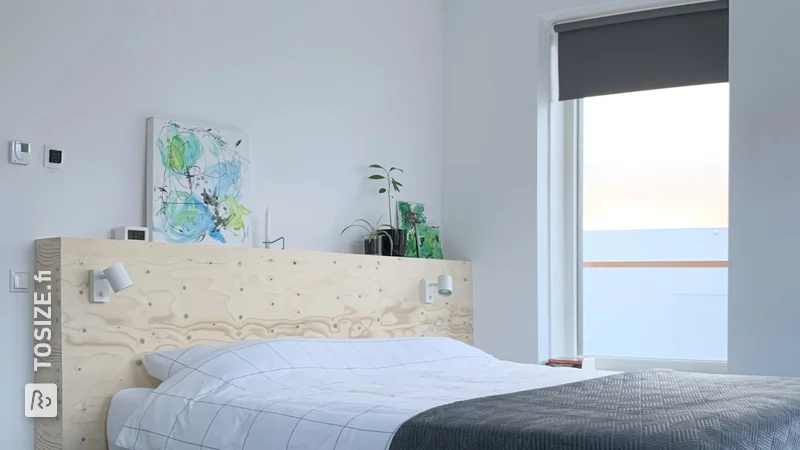
A headboard for the head of a single bed. The oak slats are glued to a thickened MDF lacquer supporting wall. It breaks up the room and gives a warm atmosphere.
How do you make a headboard from oak?
The headboard consists of two parts: MDF thickened wall and mounting the oak slats. It will take you about 6 hours to make it. Then let it dry overnight.
What else do you need to complete this job?
- Circular saw or sawing machine
- Damp cloth
- Histor Perfect Finish wood lacquer RAL 9010 semi-gloss
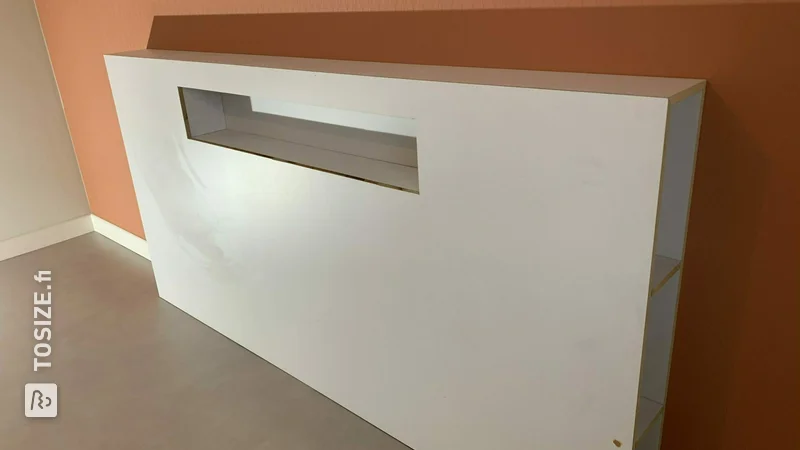
Part 1: Make your own thickened MDF wall
We have all the parts for the wall available size ordered. In my case the headboard is 100.0 cm wide by 177.0 cm high. The thickened wall consists of 5 parts: the 'front' and 4 sides all mitered with certain edges so that it could easily be folded together and glued later.
The parts were placed at home with the mitered sides against each other and stuck with painter's tape. Then turned the whole thing over and applied wood glue to the mitered edges. Because the mitered edges were straight and the painter's tape held the parts together, this went very quickly! Once all the edges were up, we taped the corners again so that they dried tightly together. This all had to dry for an hour.
When the glue was dry, all the tape could be removed from the edges. The whole thing was firmly put together and it was time to paint the thickened wall. In my case, this was Histor Perfect Finish wood lacquer RAL 9010 semi-gloss, because the other skirting boards are also painted in this color. 2 layers and the whole thing looked super sleek.
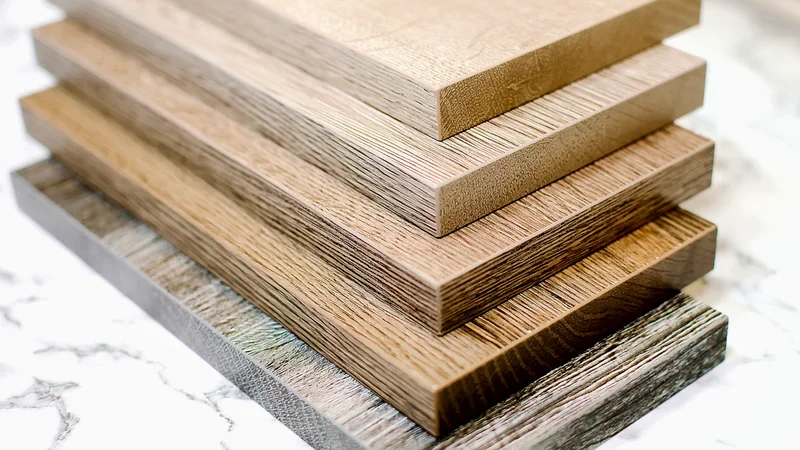
Part 2: Sawing the oak slats into 2.0 cm slats
The cutting oak slats to size
Unfortunately, TOSIZE.fi does not cut smaller than 4.0 wide. Because we wanted the slats to be 2.0 cm wide, we ordered a larger oak panel and we sawed the 2.0 cm thin slats ourselves.
Sawing the templates
To evenly distribute the distance between the oak slats, we have small 'help' molds made. Because oak slats are known to warp, this helped enormously during installation. These molds were 20.0 cm long and 2.0 cm wide. The same width as the oak slats so that the spacing was equal to the width of the oak slats.
Part 3: Installing the oak slats
This was the most exciting part! Oak warps quickly... and because we didn't want nail gun holes in the wood, we chose to mount the slats with wood glue.
The first slat was the biggest challenge. We secured this with various glue clamps, so that we were sure that it was straight. To prevent the glue from running out from under the slats, we glued 1 slat, after which we spread the glue with a second slat. This made gluing go quite quickly. Because the oak slats were bent, they had to be properly secured every time with the glue clamps.
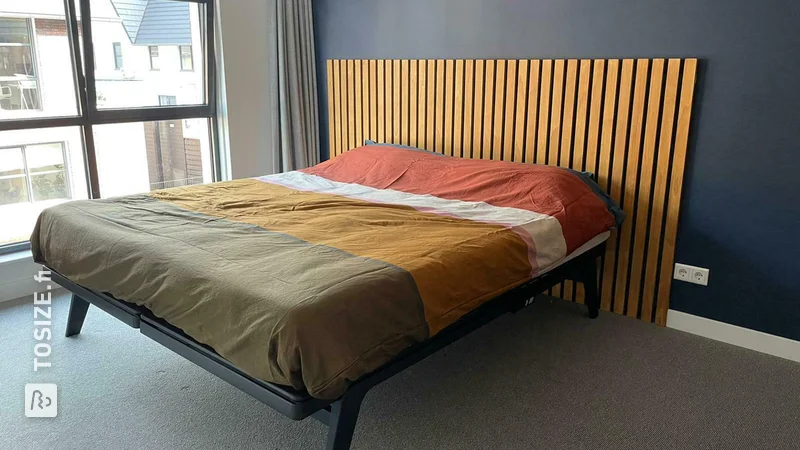
Let the whole thing dry overnight, and voila, see the result in the photo!
A headboard made to measure
HxWxD in cm: 177.0 x 100.0 x +/- 6.0
Tip! Also check out our handy DIY tips!
What now?
This is a project for inspiration. Because our assortment has changed, (some of) the products are no longer available.
View all sheet materials